Git Workflow
Idea
This is a concise manual to a basic Git workflow. You can find more details here. For each step you can find instructions how to follow that workflow using PyCharm. There is different ways to achieve the same goal without PyCharm. Once you are familiar with the basic concepts you can use any tool you like.
Instructions
Once you have an idea what you want to achieve the following steps will help you to get there.
Update Local
First we want to make sure to use the newest version of the repositories main branch. Therefore we click on the button in the bottom right corner next to the patlock. Then we see a context menue like this that displays all the local branches.
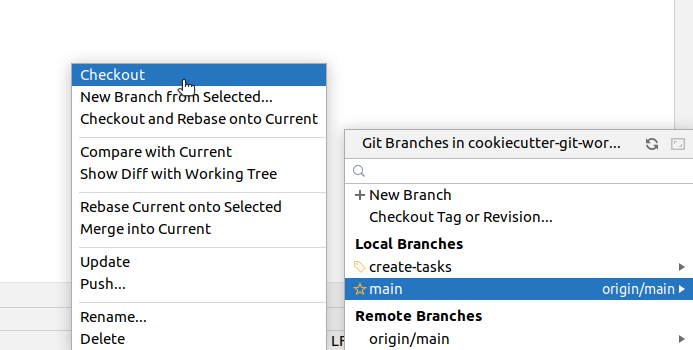
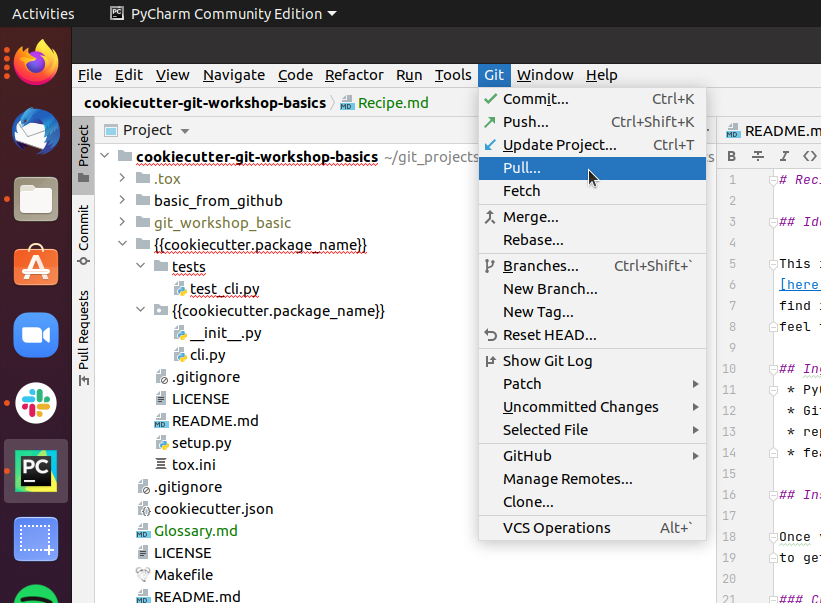
Click on the main/master branch and choose “Checkout” in the second context menue to switch to the main/master branch. Now we need to make sure that your local main/master branch is up to date with the upstream main/master. Therefore we pull the newest state from upstream. In the upper left corner we can find the menue bar, click on “Git” and choose pull in the pull down menue.
Create Branch
Now we create a branch to implement our feature. In order to do so move your cursor to the buttom right corner and click on your current branch name, which should be main/master, next to the patlock.
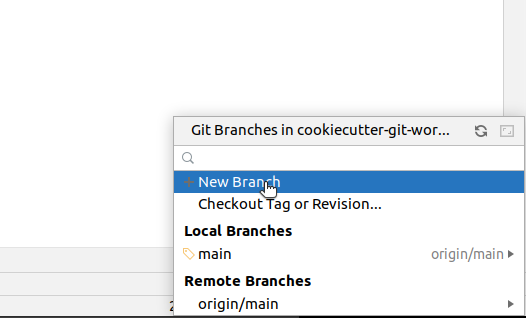
Within the context menue click on “New Branch” and enter a branch name that relates to your feature idea.
Add Commits
Now you need to add, change or delete some content in the repository to achieve your goal. For instance you want to add a new file “Tasks.md”. Then you make a right click onto the folder that should contain your new file.
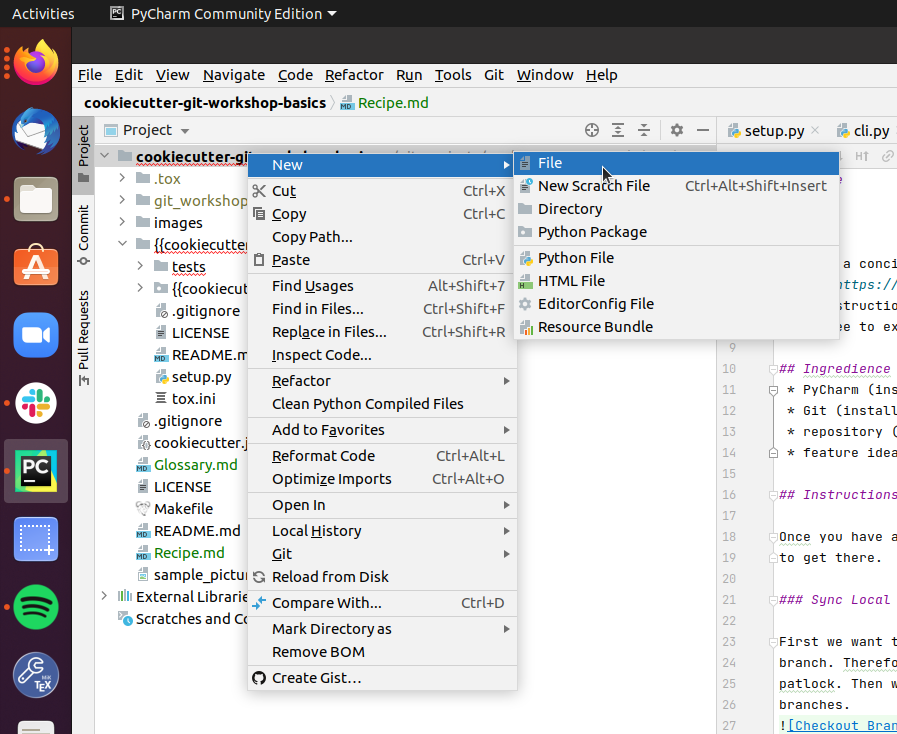
In the context menue select “new” and “File” and enter the filename in the consecutive prompt. Then PyCharm wants to know if Git should look after your new file.
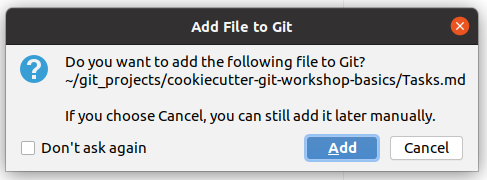
Normally that is a good idea and you shall choose “Add”.
Push Branch
Now you want to push the branch with your changes to the upstream server. This way you create an identical copy of your local branch on the server. To do so
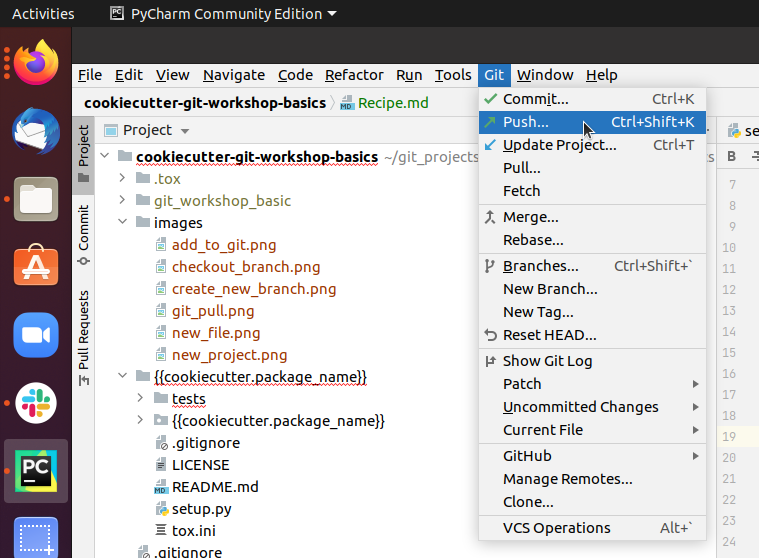
go to the upper left corner where you can find the menue bar and click on Git and choose push in the pull down menue.
Merge Request
Now that you pushed your local branch to the upstream server, you want to create a merge request on the server. Therefore open your browser and go to https://git.tu-berlin.de/your_name/your_project/. On the left hand side you click on Merge Requests. Then you get to a page that looks like this:
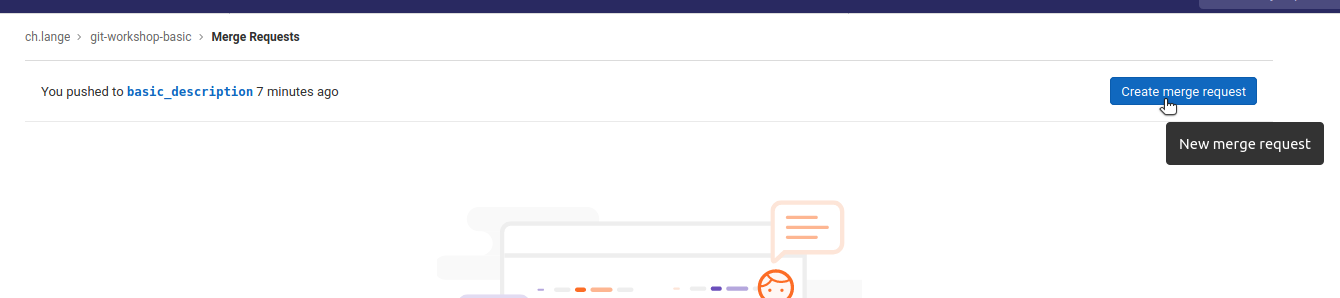
Here click on Create merge request to create a request to merge your_branch (here: “basic_description”) into main/master. Then you can add a description
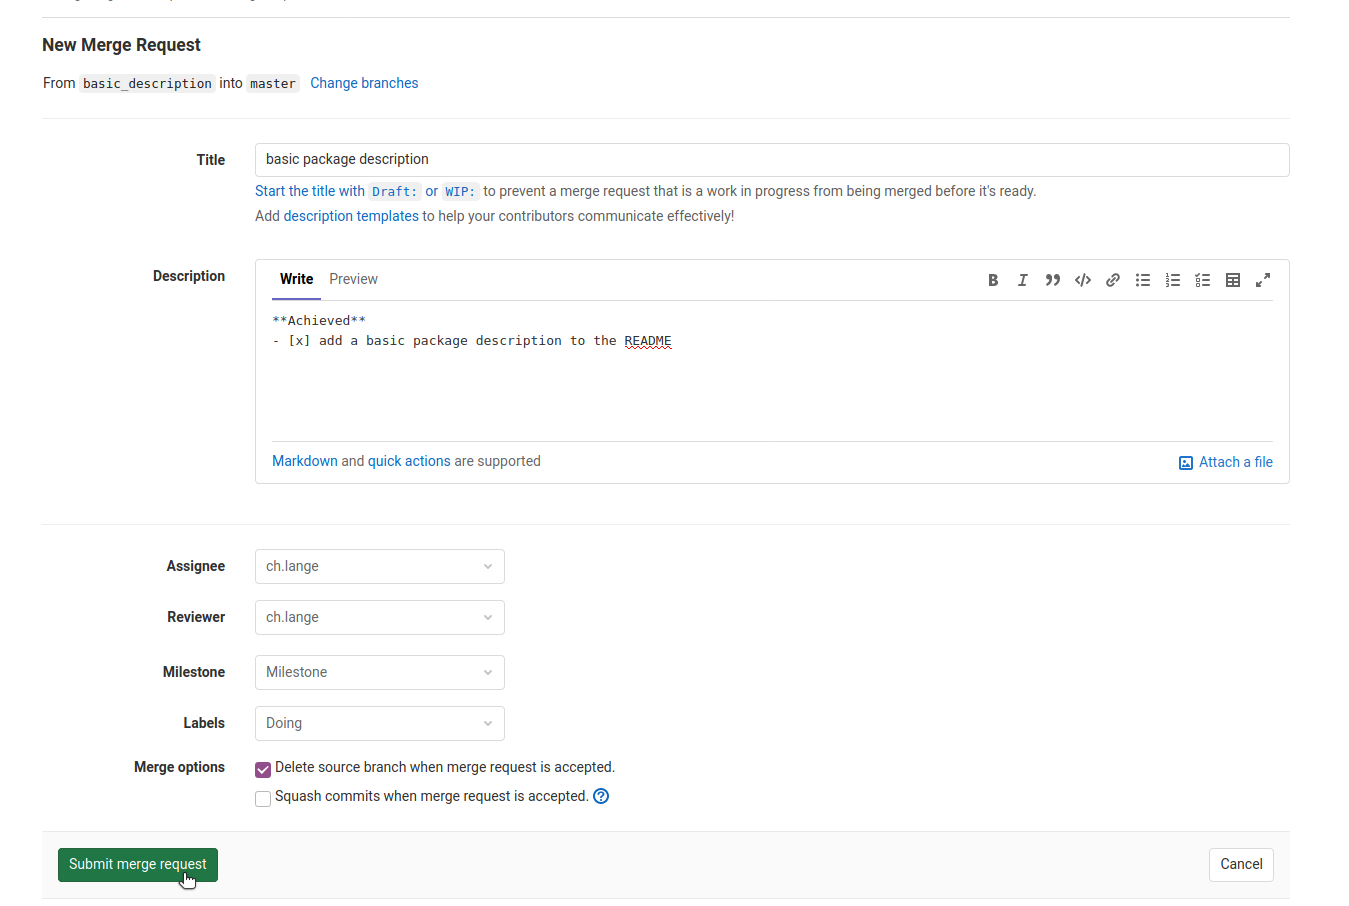
and assign a reviewer. Finally submit you merge request.
Discussion
Now the reviewer of the merge request checks your changes and gives you feedback. After some discussion you might want to go back to step 3 and add additional commits to change the current state. For the sake of practising some interations in the workshop, you can just approve your own merge requests and continue.
Merge Branch
When all discussions are done and you are sure that your changes improve the main/master branch, it is time to merge your branch by
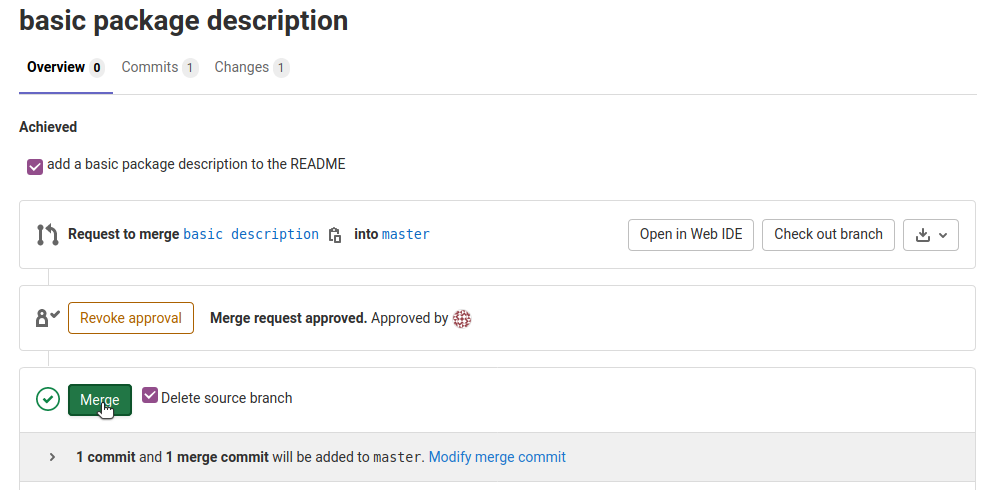
clicking on Merge.
Now master on the upstream server is newer than your local branch and its time to start all over again (Update Local).